Insight
Canoeing is a way to sit still and pay attention.
|
InsightCanoeing is a way to sit still and pay attention.
|
Canoe TripsBoundary Waters:
Boats & GearBoundary Waters Gear ListWenonah Prism (sold)
|
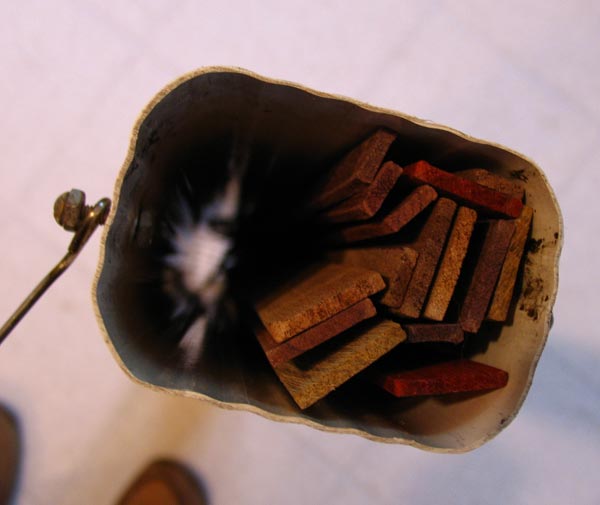
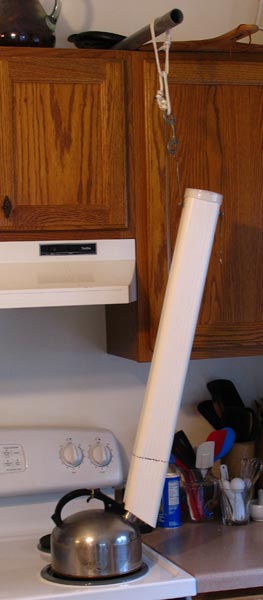
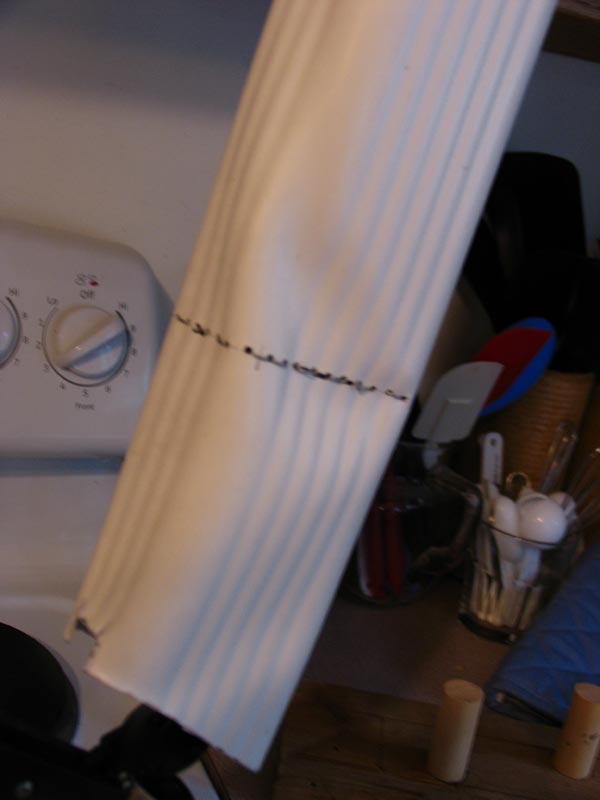
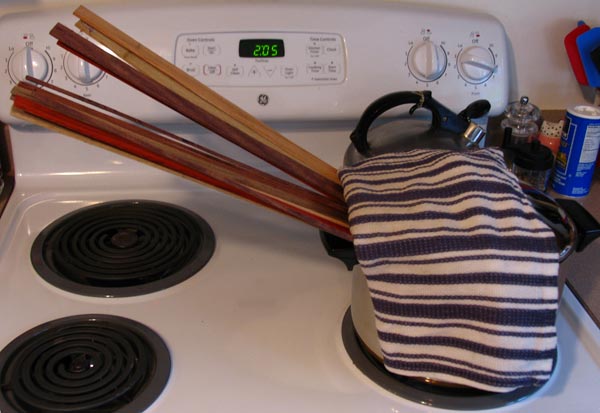
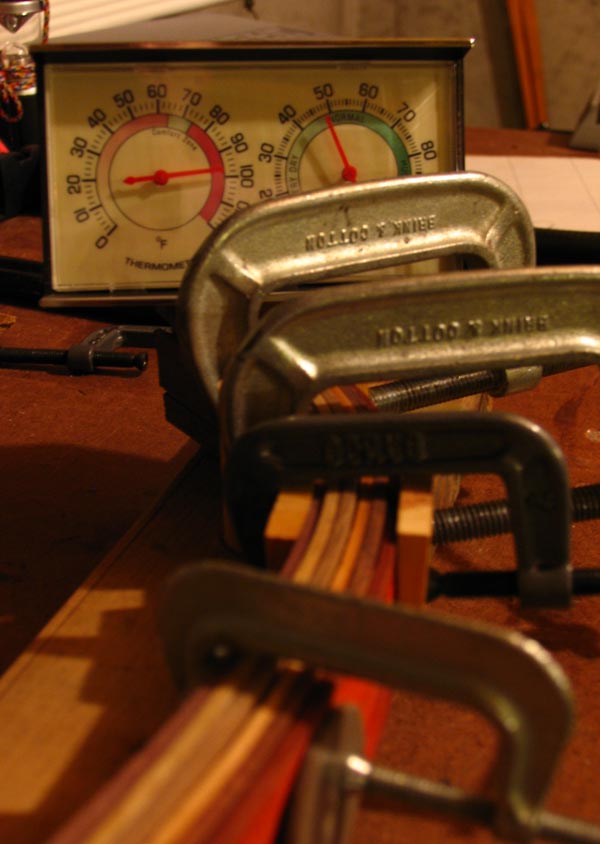
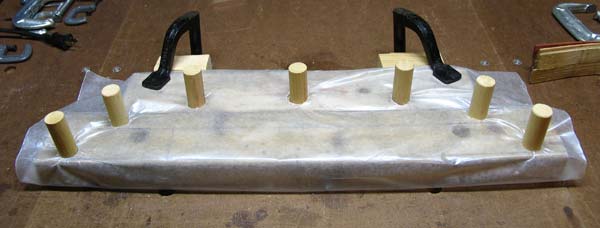
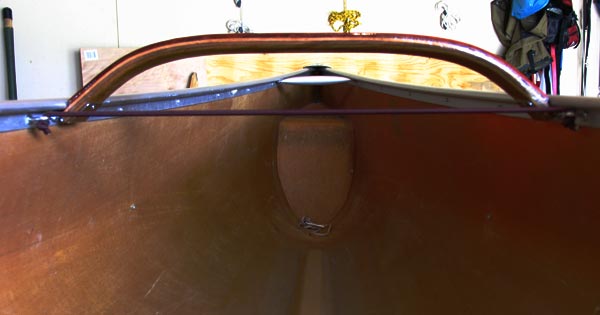
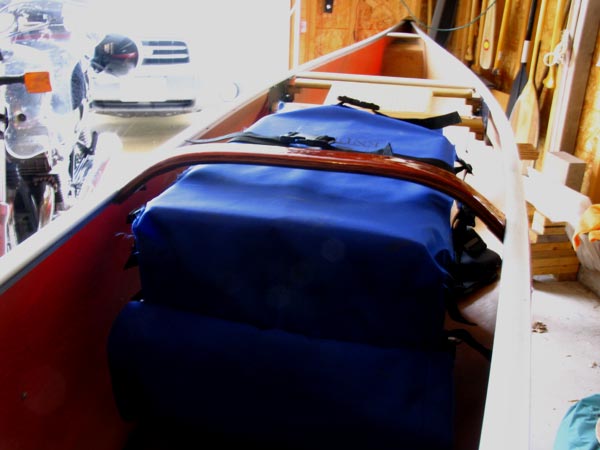
Wenonah Prism - Thwart ReplacementAugust, 2009During my last Boundary Waters trip (May, 2009) I had trouble trimming the Prism because I couldn't move the big pack forward. As this picture shows, the front edge of the pack bumped up against the thwart, resulting in a variety of generally unsatisfactory weight-shifting strategies. Many times I wished for another two inches of clearance. After discarding several unworkable options, I hit on the idea of a curved thwart. The question was how to make one. I put out feelers to several wooden canoe accessory makers but, not hearing back right away and being an impatient sort, I decided to try to make one myself. After researching methods of bending wood, I launched into the project. The rest of this page describes the process of making and installing the thwart. The first step was to get bendable wood that would fit where the old thwart was. I found a set of (12) 1/8" x 7/8" x 24" pieces at the local Woodcraft store, including two pieces each of six different kinds and colors of wood. I now had to figure out how to soften the wood enough to bend it, as well as how to hold the pieces while they set. My first strategy was steam-bending. I made a container for the pieces out of a piece of plastic downspout and suspended it over a teakettle, as shown in several diagrams I'd seen. The pieces for lamination waiting to get steamed: They were held in place by a wire screen. I cut an opening for the teakettle and hung the whole
contraption over the stove using a ten-pound barbell weight for counterbalance. The top end was capped with part of an electrical tape
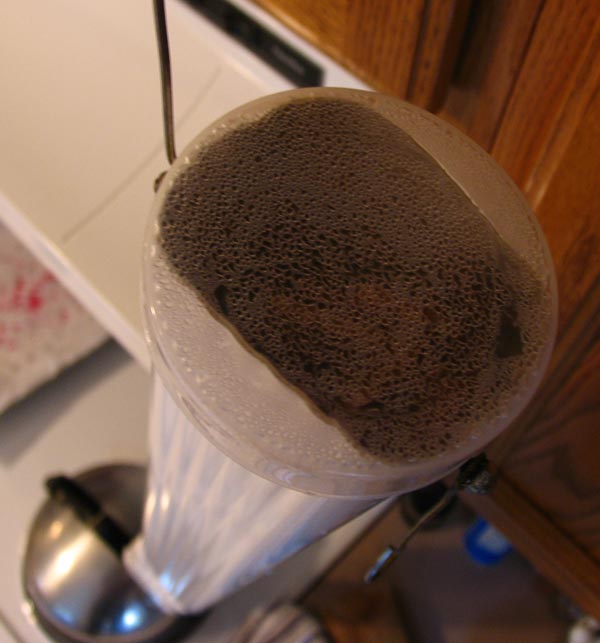
container, which fit snugly. The condensation indicated steam. The main problem with this setup was that it was too
hot for the plastic. It got pretty soft and I had to find another method. The pieces of wood reminded me of linguine. I laughed
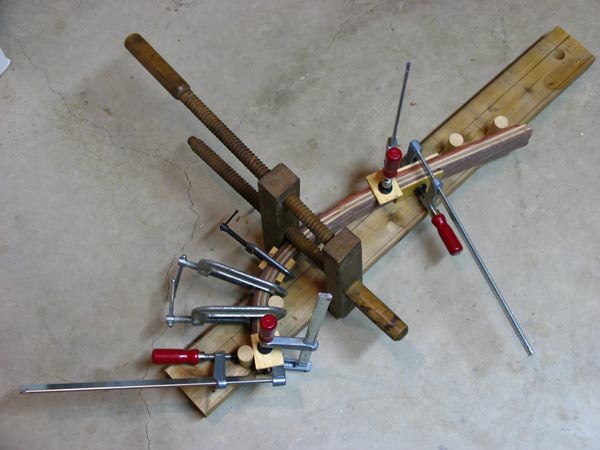
too, but it worked! I had made a clamping jig using a 2 x 4 and pieces of
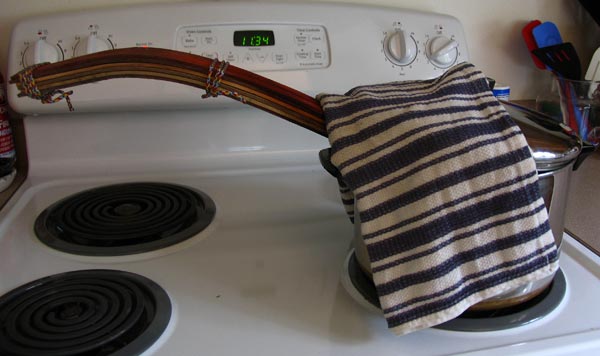
7/8" hardwood dowel. After the first end of the wood was softened enough
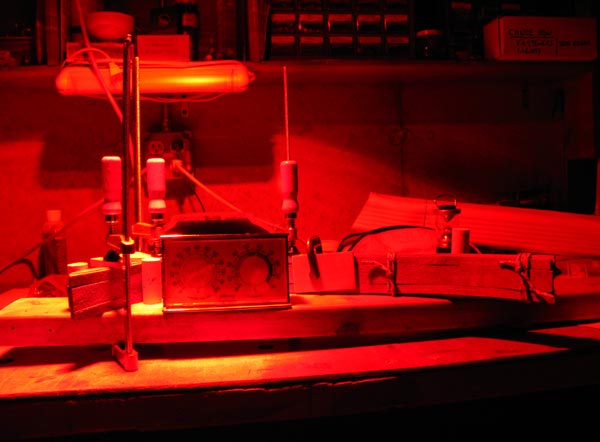
to bend I clamped it into the jig ... ... and put it under a heat lamp to dry. It was pretty warm, and after several hours the wood
was quite dry. I cooked the other end of the "pasta" ... ... and clamped it as before. As the above picture shows, the right end turned out
flatter than the left end. This was due to "springback" and was expected,
but the amount of straightening surprised me. I managed to get both ends
into the jig and clamped it in the middle to keep it from bowing out. I
left it out in the rain overnight and the next day cooked it in a 200-degree
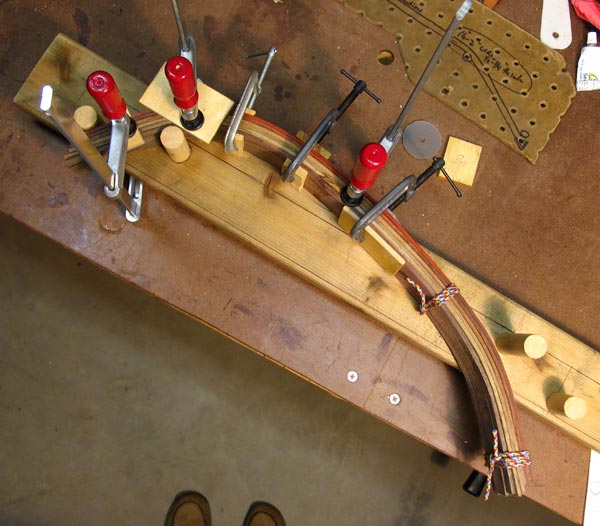
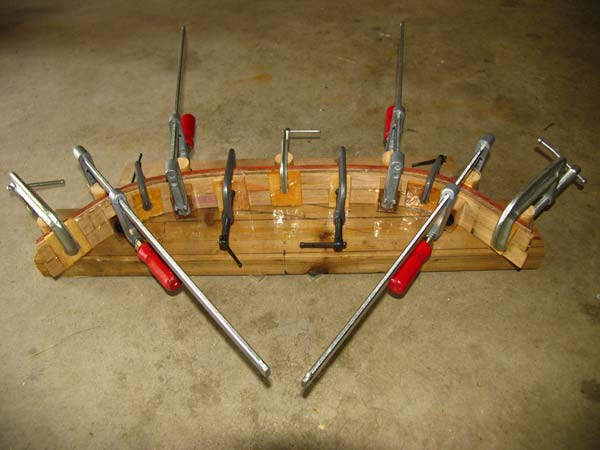
oven for six hours. That worked pretty well. The next step was to modify the clamping jig to provide
more control over the final shape during the gluing. I attached another
2 x 4 and added more dowels as clamping points, and put waxed paper
on the base of the jig to keep the glue from sticking to the wood.
I used Goop® Marine
Contact Adhesive and Sealant rather than epoxy in the mistaken belief
that it would give me more working time. The stuff was pretty sticky
to start with and got stickier by the minute. But it worked. I glued the first two layers together to form the outside
curve and clamped them until dry. Then I discovered that the glue stuck
to the waxed paper so I replaced the paper with packaging tape, which
the glue didn't stick to at all. The laminations were glued
up one at a time and clamped until dry. This picture shows the first
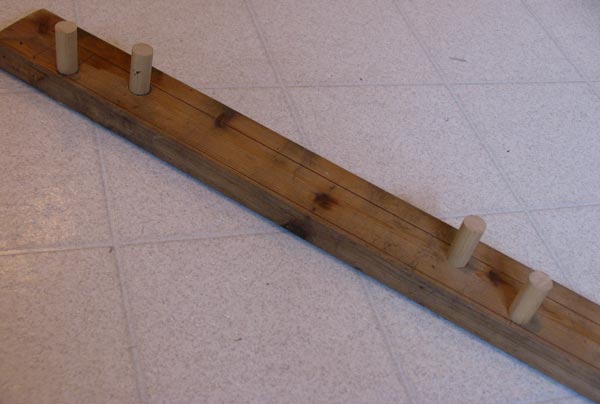
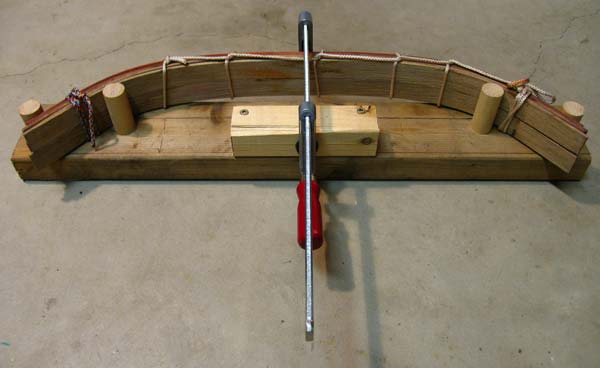
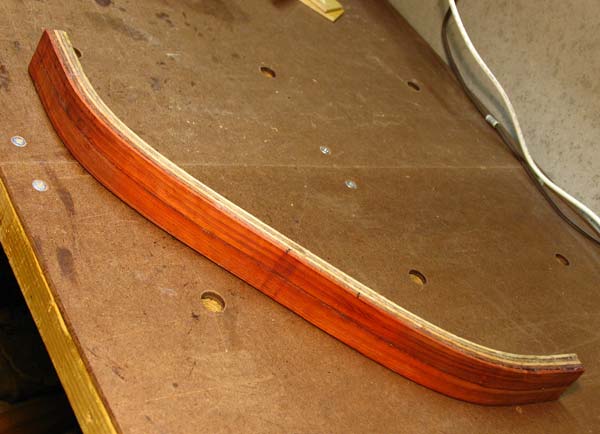
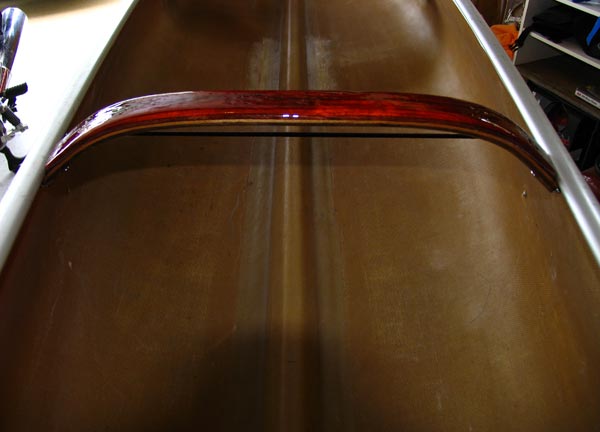
three layers. Here's the thwart with all five layers glued up, the
excess glue trimmed off, and the
ends cut to length. I could have made it with six layers, but with five
layers it's 3/4"
thick, which seems adequate. _____ _____
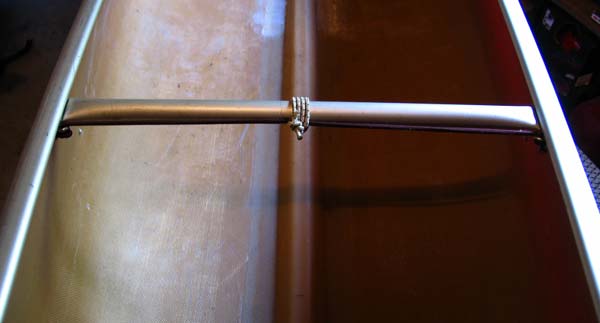
The next steps were: Here's the piece that thwarted my attempts to slide
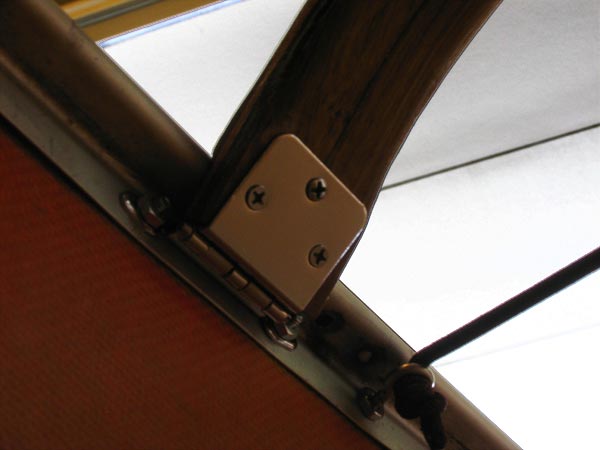
the pack forward ... ... and here's the new thwart in its place: This shows the cabinet hinge bracket. I attached it
to the boat with #8 screws rather than 1/8" rivets for additional
strength and ease of disassembly, just in case. I also added a third
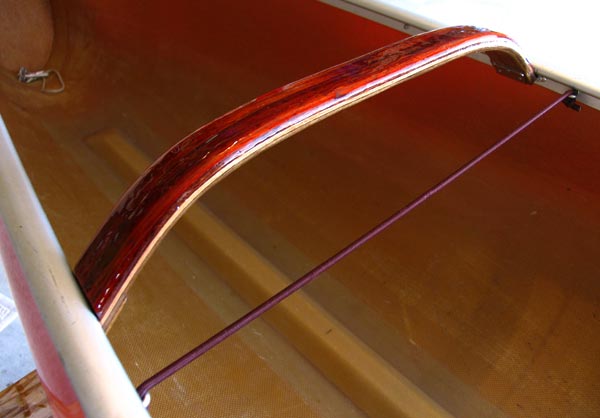
screw between the two outside screws for greater rigidity at the gunwale. The purple line is a bungee cord used to hold paddles
while portaging. It looks like there should be plenty of clearance ... ... and there is: The new thwart is plenty strong but twists a little if lifted in the middle. Lifting close to the gunwale is fine. I'll see how it works on my next Boundary Waters trip, scheduled for September 2009 - three weeks from now.
The Final WordAfter the Boundary Waters trip the following month I put a set of skid plates on the boat because the ends had worn through in a few places. I did a great job, black on red and quite smooth. But I sold it three years later, never having used it again. Poor thing ... it was pushed aside by a Mad River Independence, which I preferred as a tripping boat because of its better handling - which was itself pushed aside by a Blackhawk Ariel (for its handling on moving water) and a Hemlock Peregrine (for its handling on lakes). I wish the new owner many years of happy paddling and rowing. |
Comments and suggestions welcome. Feel free to e-mail
me.
Last updated
January 18, 2017
Brought to you by Codabone Productions ©2009